
EAS Purchase Requisition Entry (NIGP) - PTA Based
Overview - Requisition Charges to a Project, Task, & Award
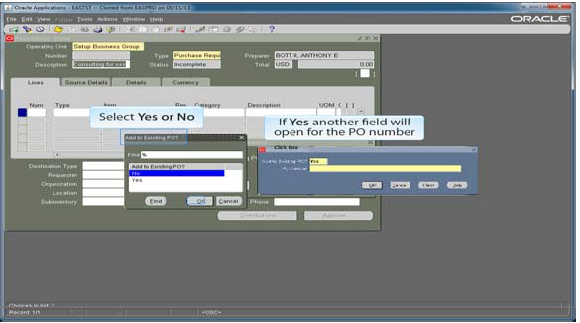
Add to an Existing PO
- When additional funds are needed on an existing PO, a new requisition is created and linked to the existing PO
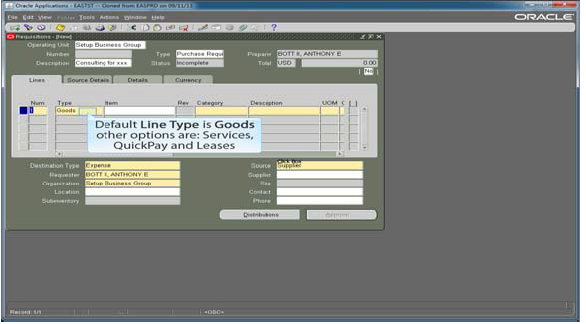
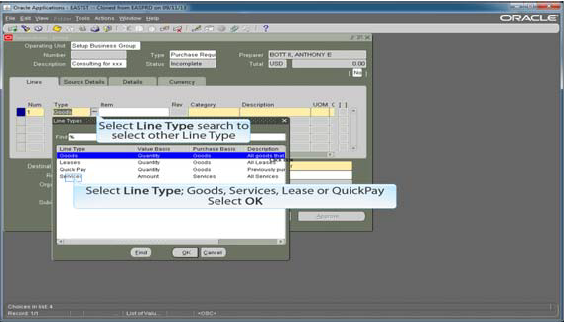
Requisition Line Types
- Goods: tangible products generally sold at a fixed unit price
- Services: intangible services generally sold hourly
- Leases: Monthly rental or lease agreements. Work with Procurement prior to use
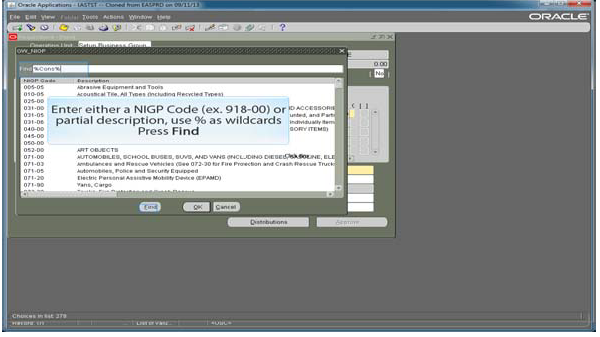
Categories (NIGP Codes)
- A National Institute of Governmental Purchasing (NIGP) code defines the products / services that a vendor provides
- Vendors receive solicitations based on the NIGP codes they register
Step-by-Step Process
Details of Requisition Request
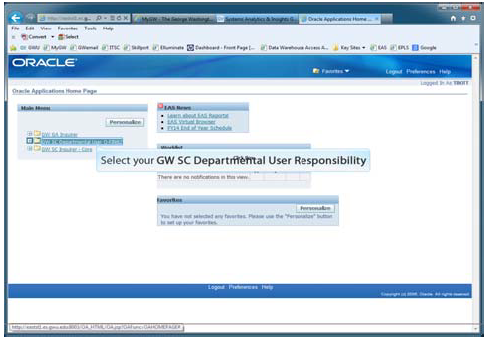
- Select the GW SC Departmental User Responsibility. Click to Proceed.
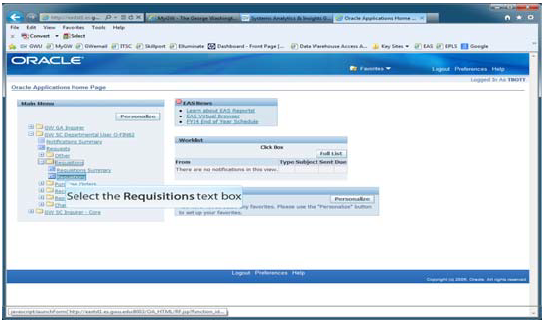
- Select the Requisitions text box. Click to Proceed.
- Enter Description - this is for your reference. Press the tab key.

- Select Yes or No. If Yes, another field will open for the PO number. Select OK.
- Default Line Type is Goods. Other options are Services and Leases. (QuickPay is no longer available.)
- Select a line type, using the Type search icon to select one other than the default of Goods.
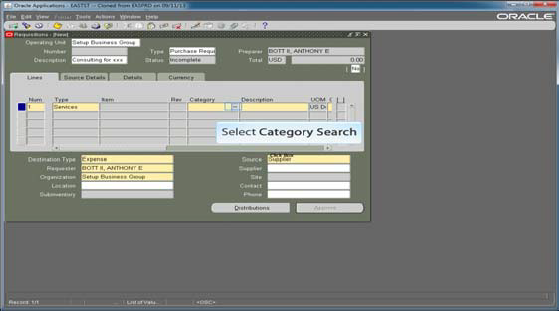
- Select Category Search.
- Enter either an NIGP Code (e.g. 918-00) or a partial description using % as a wildcard symbol. Press Find.
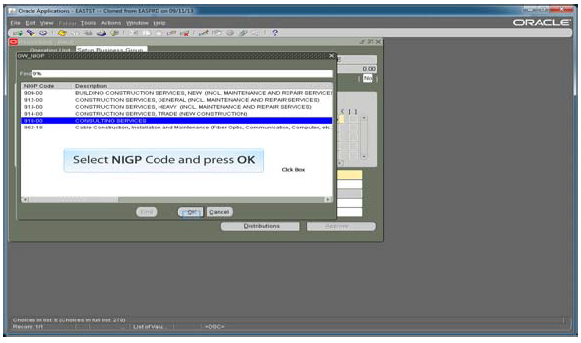
- Select NIGP code and press OK.
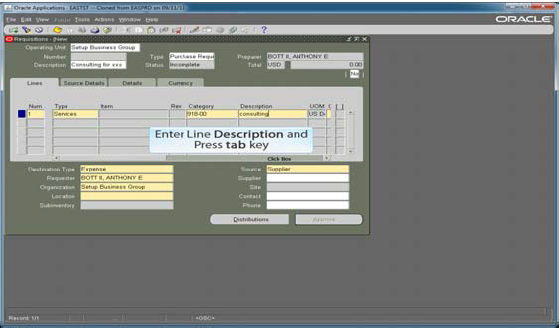
- Enter Line Description and press the Tab key.
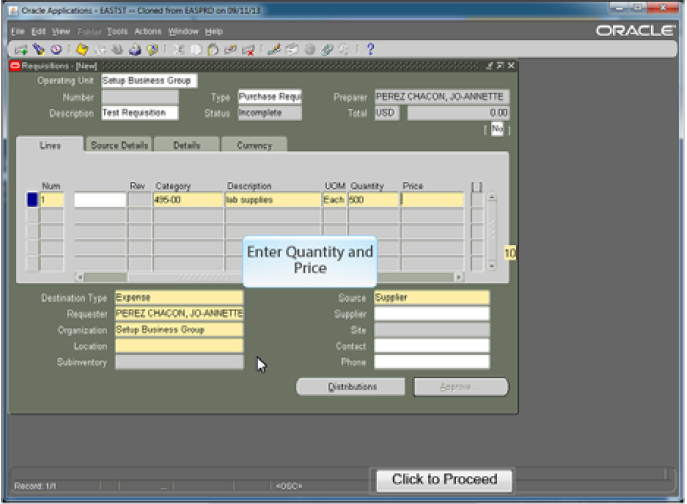
- Enter Quantity and press the Tab key. Enter Price.
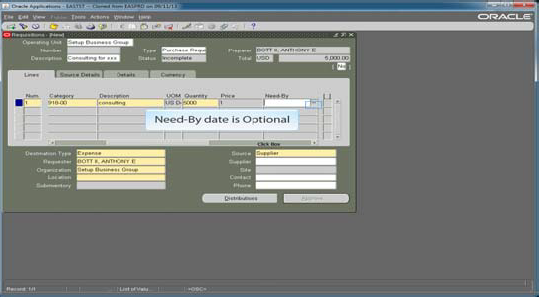
- Need-By date is optional.
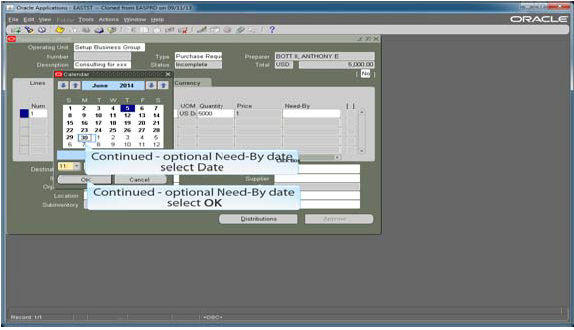
- Select Date and OK for optional need-by date.
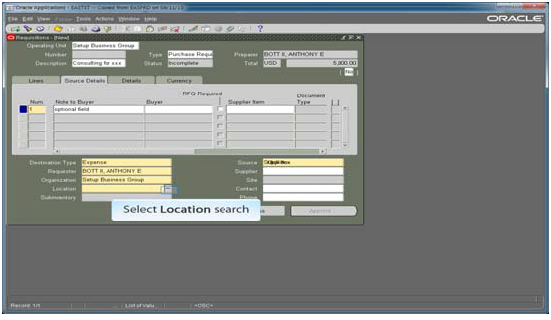
- Select Location search.
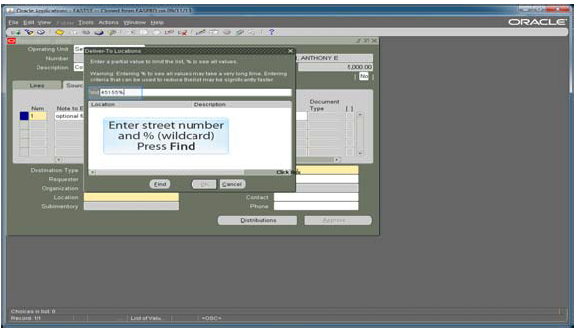
- Enter street number and % (wildcard). Press Find.
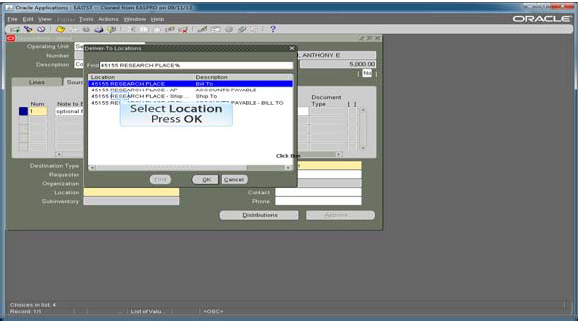
- Select Location. Press OK.
Supplier Information
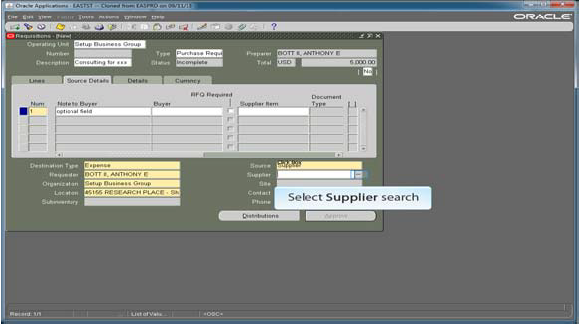
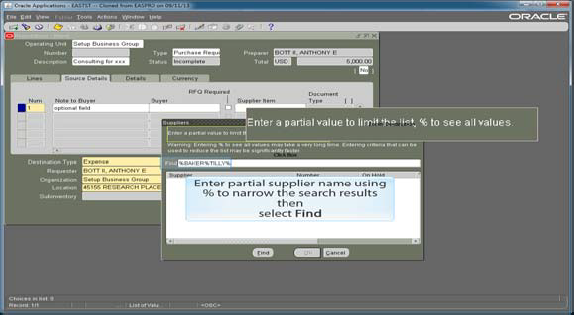
- Select Supplier search.
- Enter partial supplier name using % to narrow the search results. Select Find. Select the appropriate supplier if multiple ones are listed, and select OK.
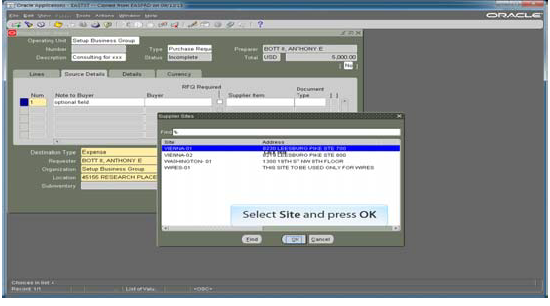
- Select Site search.

- Select Site and press OK.
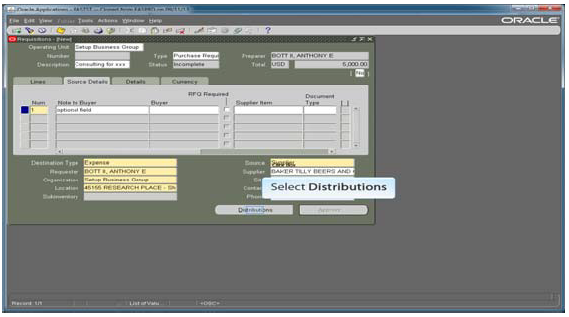
5. Click the SAVE icon at the top left before proceeding to the Distribution page.
Distributions
- Select Distributions.
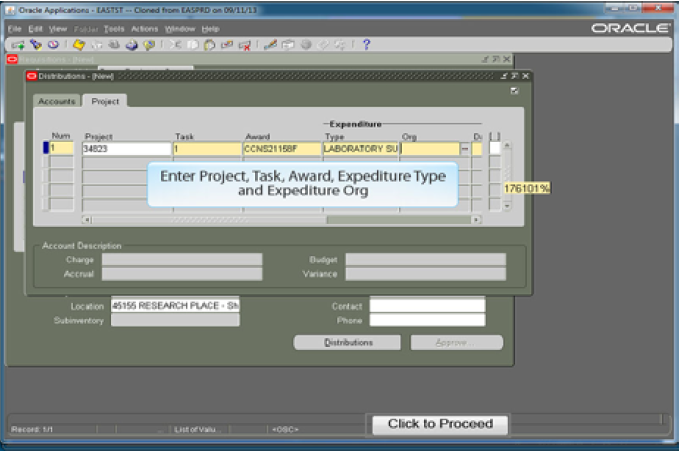
- Select Project.
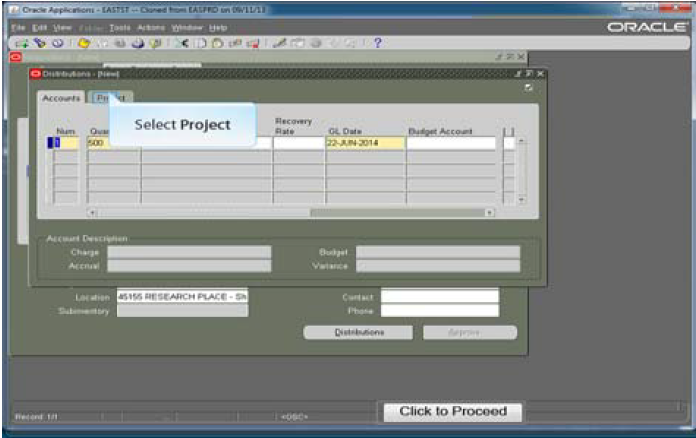
- Enter Project, Task, Award, Expenditure Type, and Expenditure org.
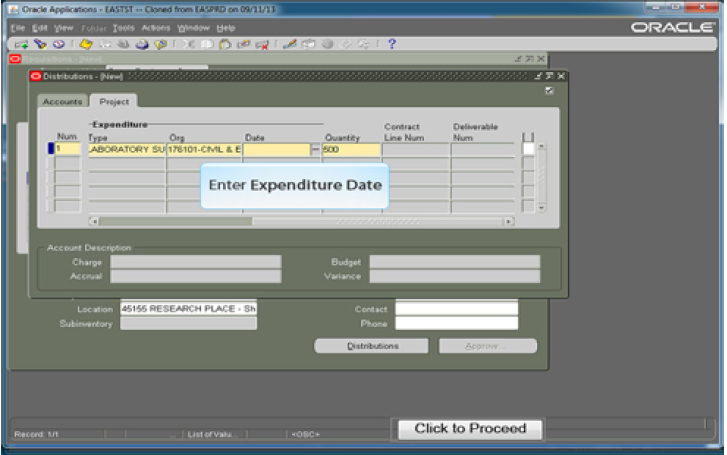
- Enter Expenditure Date.
- Select field in [ ] .
![Selection of [ ] field](/sites/g/files/zaxdzs4701/files/downloads/NIGPa36.PNG)
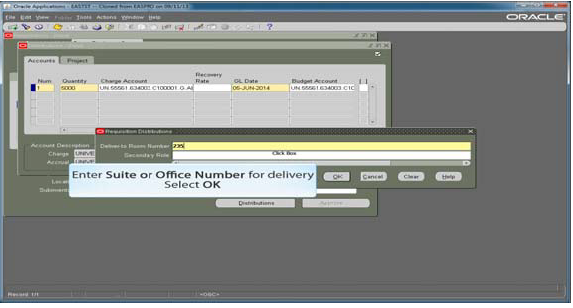
- Select Suite of Office Number for delivery. Select OK.
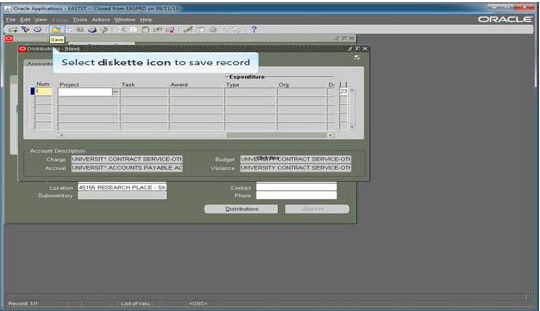
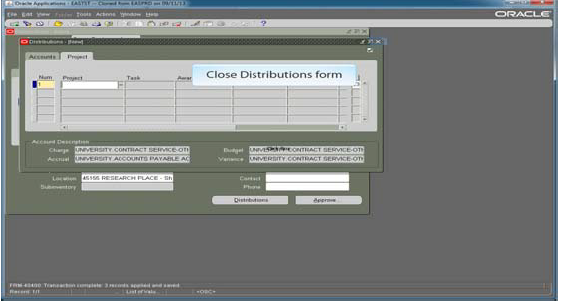
- Select diskette icon to save record.
- Close Distributions form.
Attachments
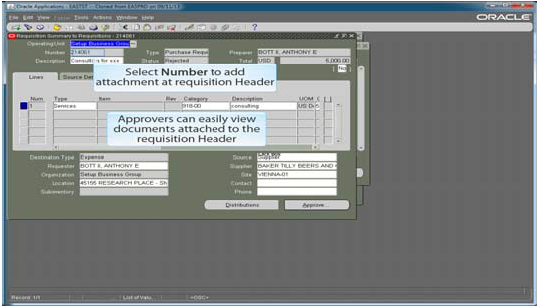
- Select the Number at the requisition header to add an attachment. Approvers can easily view documents attached to the requisition header.
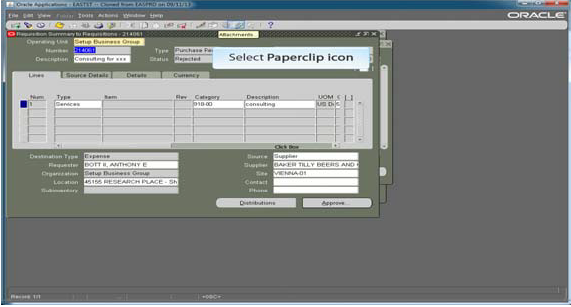
- Select the paperclip icon.
- Select attachment Category search.
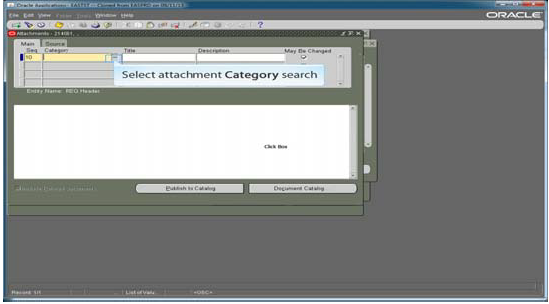
- Enter % and select Find.
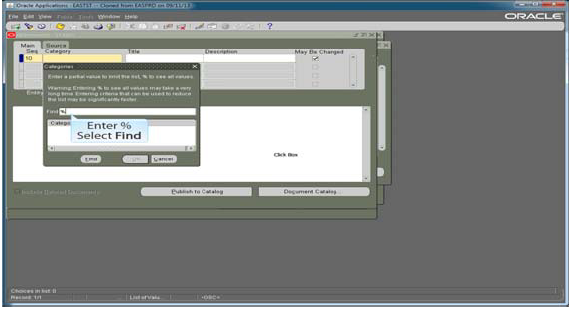
- Select To Buyer to ensure the Procurement and Approvers can view attachments. Select OK.

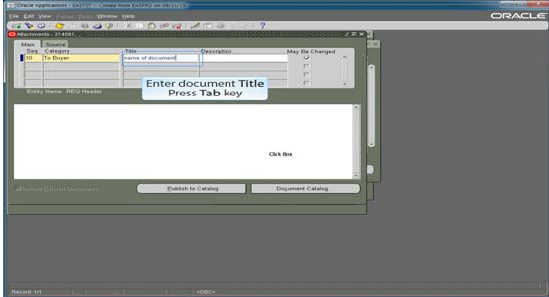
- Enter document title and press Tab key.
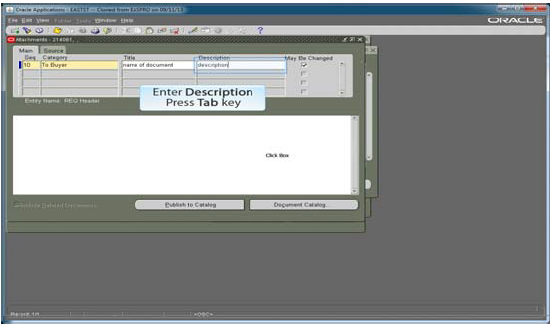
- Enter attachment description and press the Tab key.
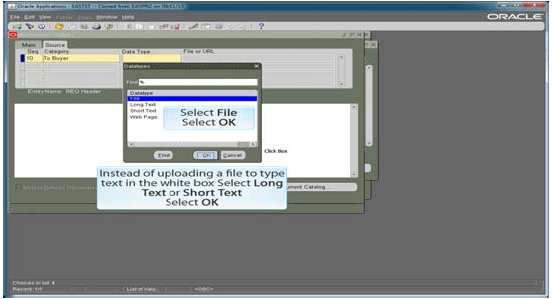
- Enter Data Type search.
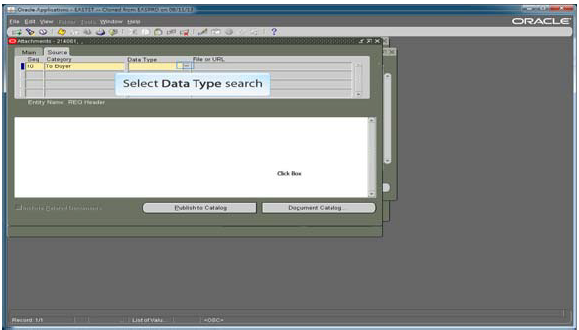
- Select File. Select OK. To type text instead of uploading a file, select Long Text or Short Text and select OK.
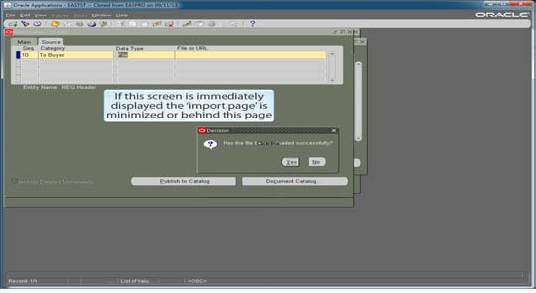
- If this screen is immediately displayed the "import page" is minimized or behind this page.
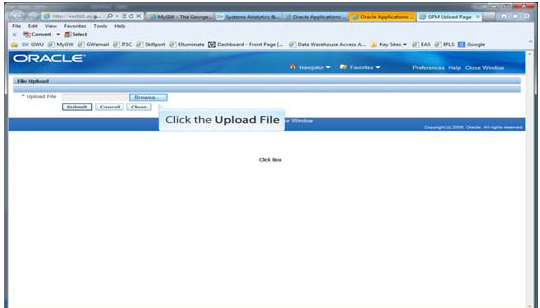
- Click the Upload File box.
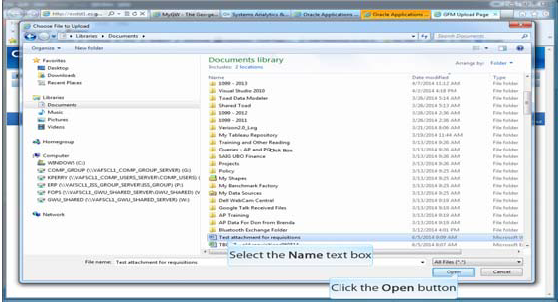
- Select the Name text box, select the file to upload, and click the Open button.
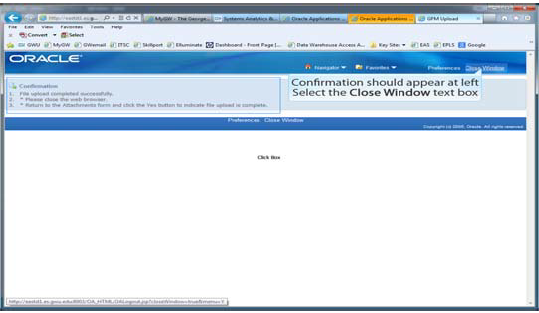
- Confirmation should appear at the left. Select the Close Window text box.
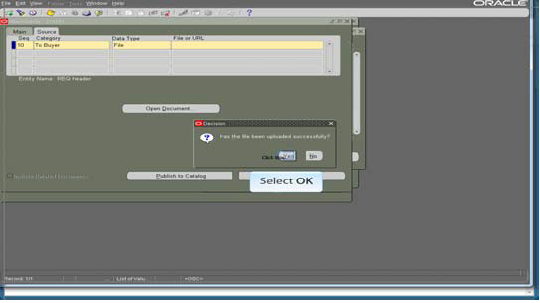
- Select OK.
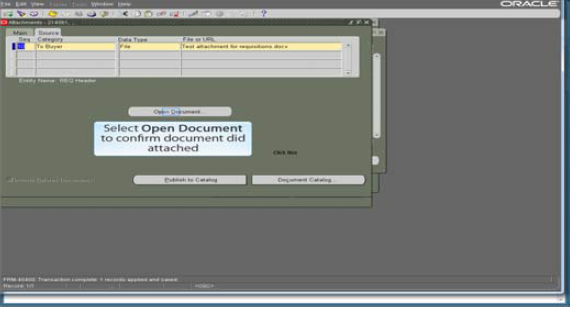
- Select Open Document to confirm document was attached.
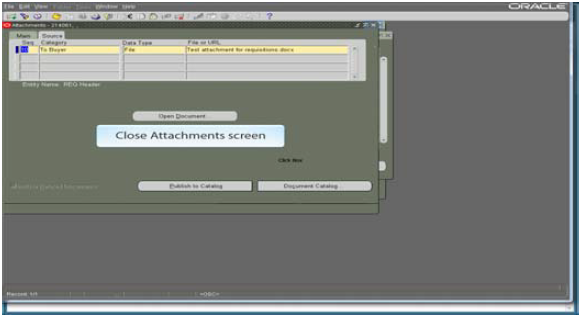
- Close Attachments screen.
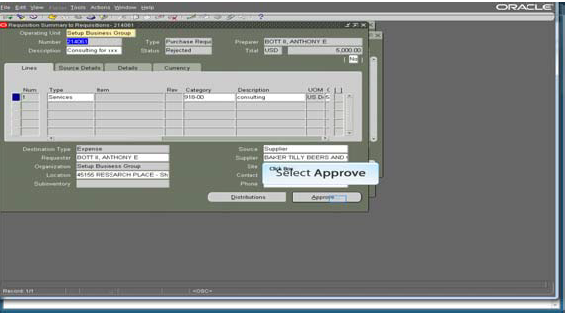
Approval
- Select Approve.
- Optional - add a not to the approver. Select OK.
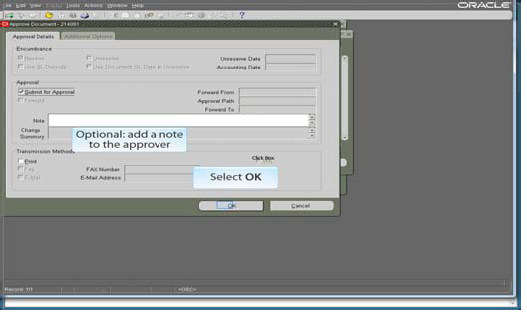
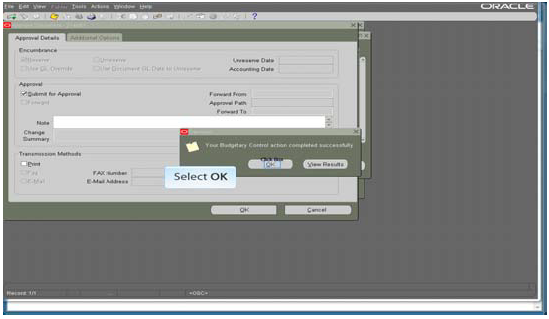
- Select OK to submit.
- A new Requisition opens for entry. Close if not needed.
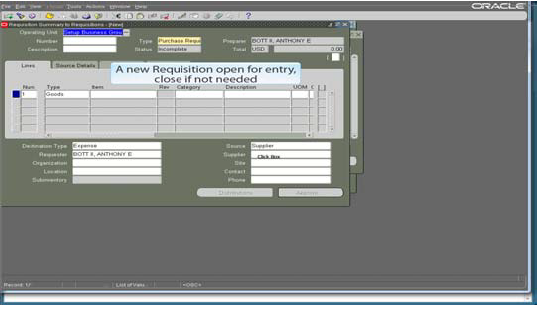
Requisition entry and submission complete!