
Maintaining Blanket PO Releases
Maintaining Blanket PO Releases
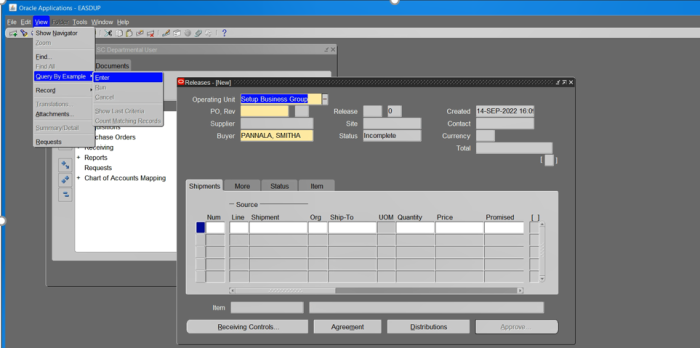
Step 1. Identify the Purchase Order and Release number to be modified. Log into EAS using your userid and password. If you have never accessed or logged into EAS, please reach out to the help desk at ithelp gwu [dot] edu (ithelp[at]gwu[dot]edu) or ithelpmfa [dot] gwu [dot] edu (ithelp[at]mfa[dot]gwu[dot]edu). Use the GW SC Departmental User responsibility. Click on Purchase Orders and then Releases.
NOTE: When you first enter the Releases screen, your name will appear in the Buyer field and will change to the Procurement Buyer listed on the BPO after it is selected.

Step 2. Search for your specific PO/Release combination by clicking the View dropdown and selecting Query by Example and Enter. Contact p2pgwu [dot] edu (p2p[at]gwu[dot]edu) or /p2pmfa [dot] gwu [dot] edu (p2p[at]mfa[dot]gwu[dot]edu) if you have any questions.
Fields will change color from yellow and gray to light blue and white to signify search mode. Enter the BPO number and the Release number to modify.

Step 3. Enter the PO number in “PO,Rev” field. For the example we are using 1000240927 for the search. Run the PO/Release search by clicking the View dropdown and selecting Query by Example and then Run. Contact p2pgwu [dot] edu (p2p[at]gwu[dot]edu) or /p2pmfa [dot] gwu [dot] edu (p2p[at]mfa[dot]gwu[dot]edu) if you have any questions.

Step 4. The selected Release is shown and available for modifications. Increase the available funding by adding a new line to the Release. Click beneath the last number in the Num field to add a new line ... or click the last visible line and press the down arrow.
Adding a new line to the release should be unique, for the original individual temp staff, and not for a new placement.


Step 5. Click in the Shipments field and Click in the Num field. Org and Ship to will be automatically populated. Click in the Line field, then click the 3 dots dropdown icon to open the PO Lines search box. Type % and press Find for a list of the products or services available on the BPO.


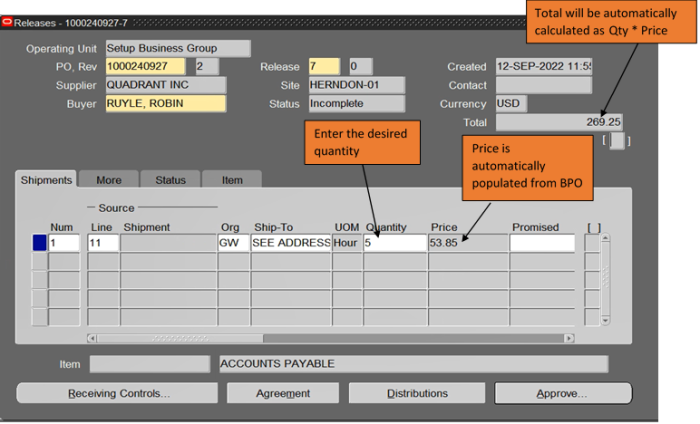
Step 6. Select the Line Number and item description and click OK. The BPO item description will appear in the lower right corner beside the Item field. Enter the total number of hours estimated for the duration of the Temp assignment desired in the Quantity field. Total will be calculated automatically as quantity times the price.
Note: Price is defaulted from the BPO and cannot be changed. Only enter the desired quantity (hours).
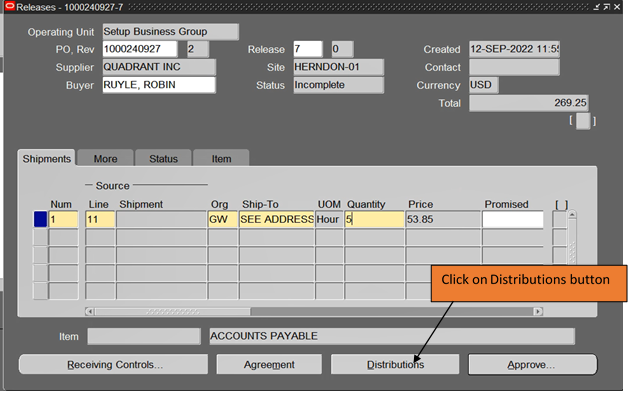
Step 7. Click the Distributions button at the bottom of the page.
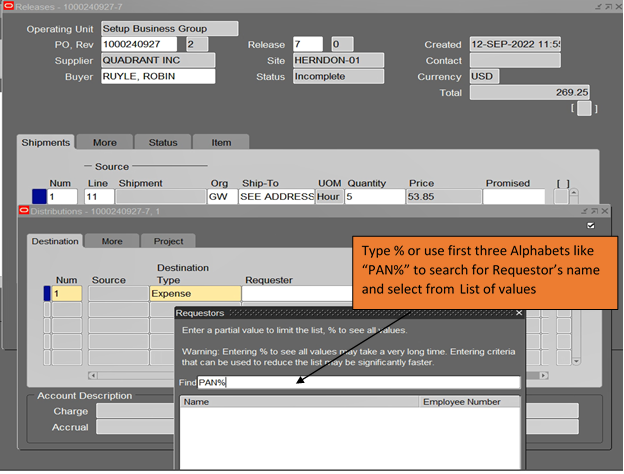
Step 8. Enter the Requester’s name (person creating the release), pressing the three dots symbol for each field to open the search box.


Step 9. Enter the Deliver To location, pressing the three dots symbol to open the search box.

Step 10. If your purchase is charged to an expense account, tab or scroll to the right and click the Charge Account field to open the Alias window. Enter your Alias and press OK. Enter the Account and press OK. All other charge account information is pre-populated. If your Purchase is charged to a PTA skip Step 10 and complete Step 11.


Note: Don’t split the distributions on one line. Multiple lines can be entered as an individual line item for each cost center.
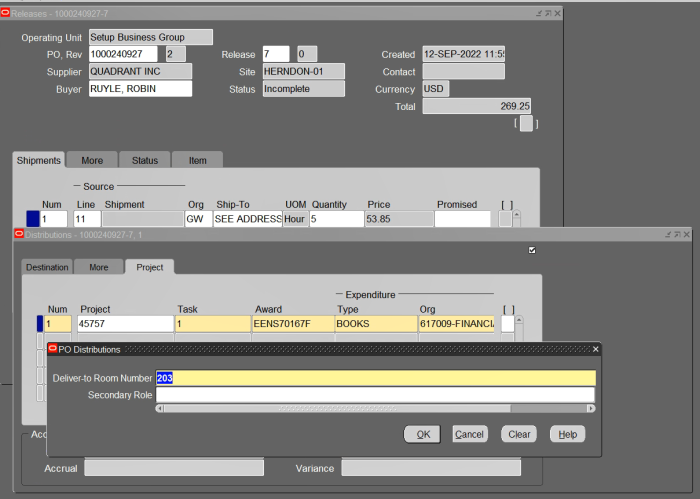
Step 11. If your purchase is charged to Project/Task/Award combination, click on the Project tab and enter all the appropriate project details - Project Number, Task Number, Award Number, Expenditure Type, Expenditure Org and Expenditure Date.


Note: Don’t split the distributions on one line. Multiple lines can be entered as an individual line item for each cost center.
Step 12. Place your cursor in the bracketed field “[ ]” and use CTRL+L for the field to open. Enter the delivery room number and phone number, press OK, and close the distribution form.

Step 13. Click on Save. Note that the original release number will not change. Press the Approve button at the bottom of the form to open the Approve Document form.

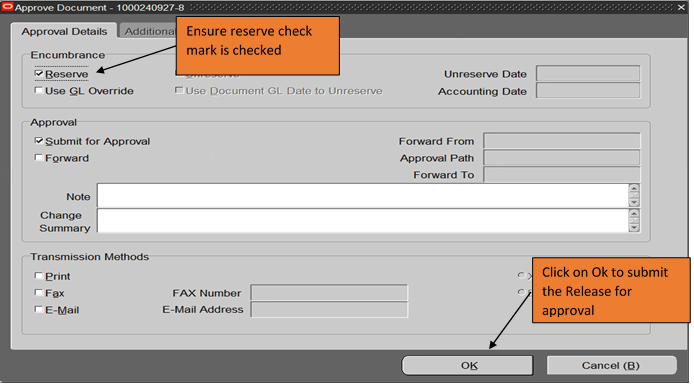
Step 14. Ensure that a check mark is in the Reserve and Submit for Approval boxes and press OK.
BPO Release has been submitted for approval. (If you have a known approver in your requisition workflow, please notify them to approve the Release).