
Scheduling and Emailing Reports
Reports can be scheduled to run at specific times, run periodically, and increment date parameters. Report outputs can be e‐mailed to specific EAS users so that they can be viewed via a link.
Scheduling Report
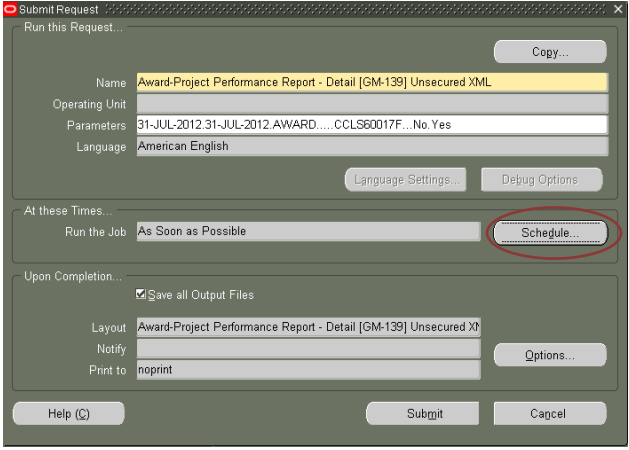
After selecting your report and entering the parameters, click on the “Schedule” button to schedule the report to run at a specific time. The Schedule Button is located in the block titled “At These Times”. The schedule form provides several scheduling options. The default option is “As Soon as Possible”.
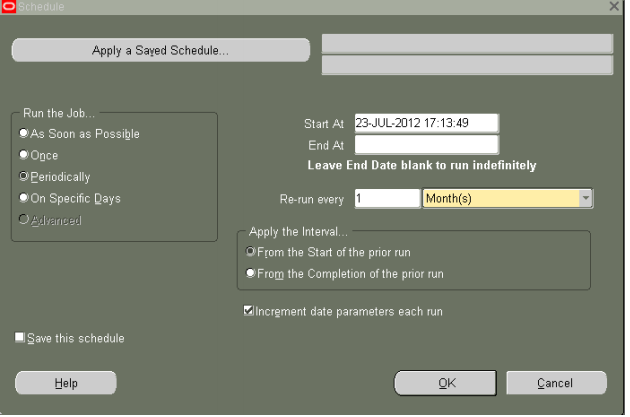
- As Soon as Possible (default): This option submits your request as soon as possible.
- Once: This option submits your request once at the time and date you specify.
- Periodically: This option submits your request repeatedly at the interval you specify.
- On Specific Days: This option submits your request repeatedly on specific days of the week or month.
- Apply a Saved Schedule: This option allows you to re‐use a previously defined and saved schedule. You may modify the saved schedule for this one submission or save the modified schedule with a new name for future use.
- Advanced: This option is not available at this time.
- To schedule a request to run Periodically, you must determine how often you want to run the request and if you want it to run for a specific timeframe or indefinitely.
Create a New Schedule
- Start At: Use the List of Values (LOV) calendar to choose a date and time
- . End At (optional): If you require this report for a specific time only, use the LOV calendar to choose an end date and time. If you want the report to run indefinitely at the specified time, then leave this option blank.
- Re‐run every: Use this option to choose the frequency of submission. The report can be run Monthly, Weekly, Daily, by the Hour, or by the Minute.
- Apply the Interval: Use this option to determine when to start the clock for the next run. For most reports, the default of From the Start of the prior run is sufficient.
- . Increment date parameters each run (optional): Use this option to have the value for that parameter be adjusted to match the resubmission interval. For example, if the value for the parameter is 25‐JUL‐2012 17:00:00 and your interval is monthly, the parameter is adjusted to 25‐AUG‐20012 17:00:00 for the next submission.
- Save this schedule (optional): This option allows you to save the schedule. You will be prompted for a Schedule Name and Description. Note that a detailed Schedule Name and Description is recommended since all end users can view saved schedules.
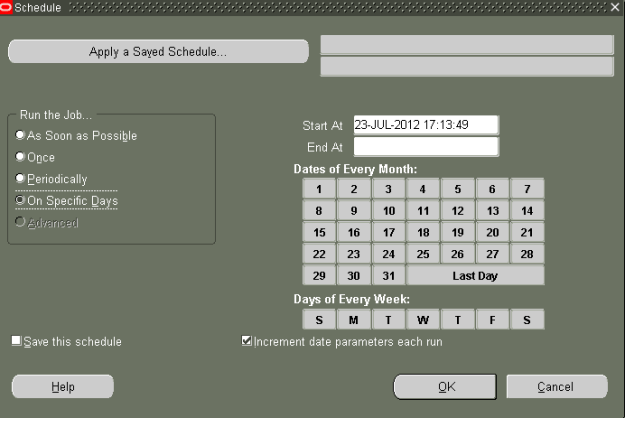
To schedule a request to run On Specific Days, you must determine which dates or days of the week you want to run the request and if you want it to run for a specific timeframe or indefinitely.
Apply a Saved Schedule
To schedule a request using Apply a Saved Schedule, you can utilize one of your previously saved schedules or a schedule created by another end user.
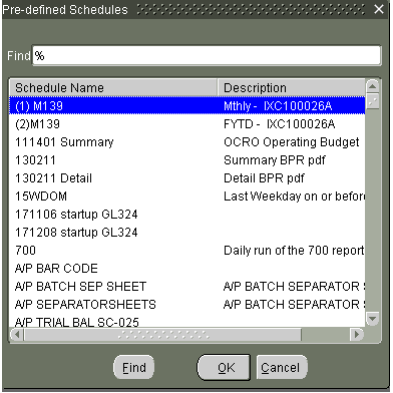
Once you select a saved schedule, you can alter the existing settings and save the new schedule with a new Schedule Name and Description.
Once you have scheduled your report(s), you may see those requests when you View your Requests or if you have just submitted a new request. The reports will appear with a Phase of Pending and a Status of Scheduled.
It is important to note that if you accidentally schedule a report or if you no longer need the scheduled report, you can cancel the request with the Cancel Request button. Cancelling a request cannot be undone. Please note that processes (not reports) should never be cancelled. If you are not certain about whether or not it is safe to cancel a request, please contact the Help Desk at 202‐994‐4948.
Emailing a Report
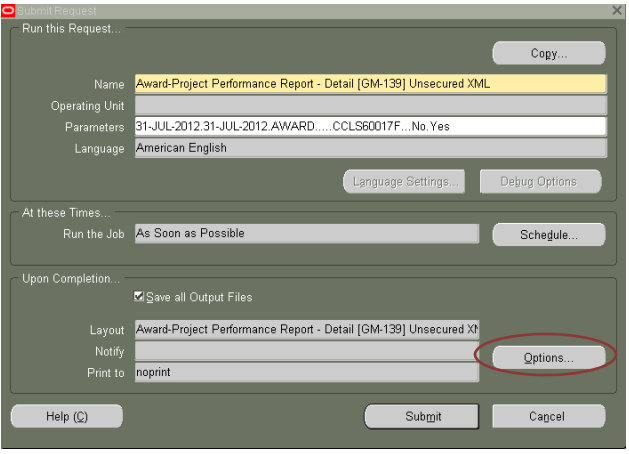
After selecting the report to run and entering the parameters, click on the Options button to send a URL to specified recipients for report retrieval. The Options button is located in the block titled ‘Upon Completion’. The Upon Completion form provides you the option to ‘Notify the following people’.
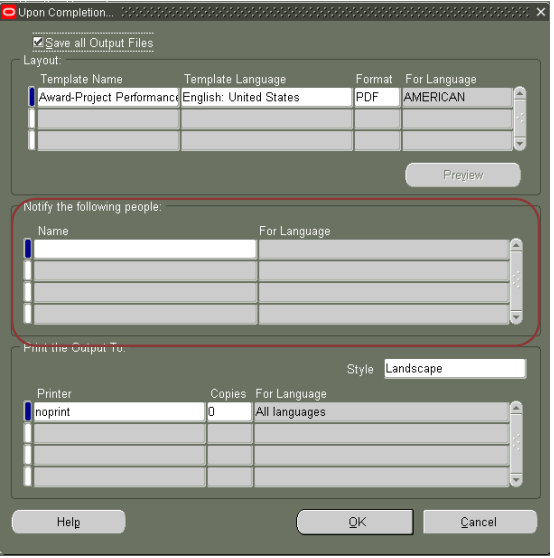
In the Name field, you can utilize the List of Values to notify an individual. Notification means that an email will be sent to the recipient(s).
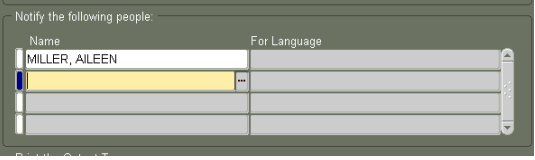
The email includes a URL which will provide a single access to the report for security reasons.