
GL 324B BPR Detail Request
Submit Request Option for Running the GL 324B Budget Performance Reports Detail
- Log into EAS and select your GL Entry or GL Inquiry responsibility.
Select: Reports: Request, Run Standard Requests

Or Select: Other, Request, Submit New Request

- Select Single Request and Click OK.
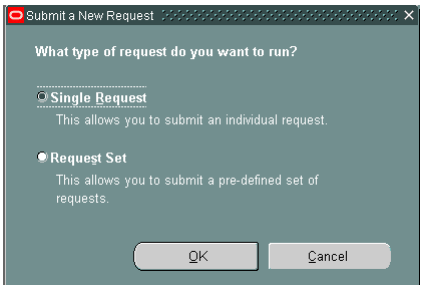
- The Submit Request form appears. Use the list of values key to find the Budget Performance Report you would like to run, select the report, and click OK. Note: There are two formats of the Budget Performance Report- Detail, PDF and CSV. PDF allows you to view online and print. The CSV format allows you export to Excel.

- Complete the parameter page, then select OK. Assuming a monthly review, this request is being submitted for the prior month’s expenses.
- Ledger Id = George Washington University
- Budget Name = Use the appropriate” APPROVED” budget associated with period under review
- Period Name = The desired period for review
- Organization From/To = Single value, range
- Funding Source From/To = Single value, range

- You are now ready to submit the report for processing. Click Submit.

- Click Refresh Data tab to check the progress of your request.

- Once your request has completed:
For PDF format, click the View Output tab to view the report.

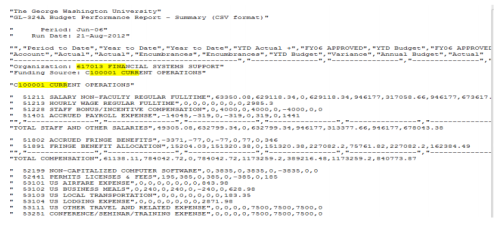
For CSV format, click the View Output tab.
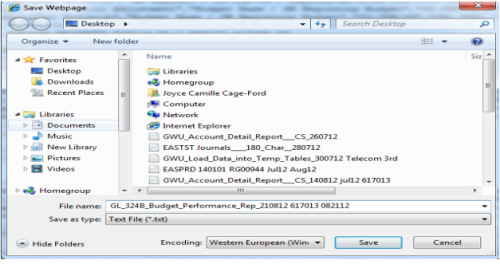
Go to File, click Save As:
- Select a Directory to place the report.
- File Name- append to displayed name or choose a different name.
- Save as type -Text File.
- Click Save.
- Open Excel and locate the file saved. Make sure the File Type is set to All Files, click Open.

- Three step import process to Excel.
- Select – Delimited and click Next.

- Select – Check Comma, uncheck Tab

- Click the Finish Tab, the report appears as an Excel worksheet.
