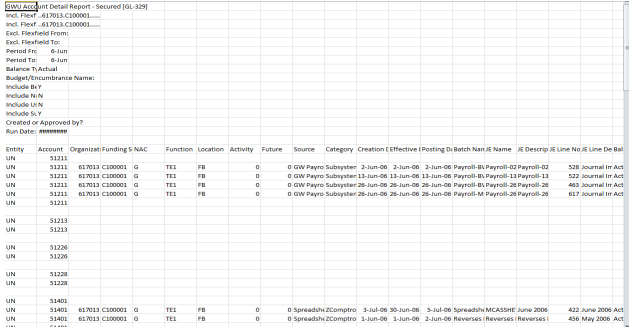
GL 329 Account Detail Request
Submit Request Option for Running the GL 329 Account Detail Report
- Log into EAS and select your GL Entry or GL Inquiry responsibility.
Select: Reports: Request, Run Standard Requests

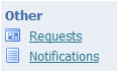
Or Select: Other, Request, Submit New Request
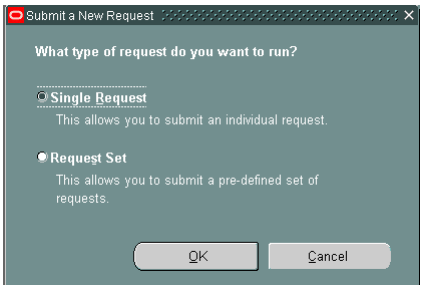
- Select Single Request and Click OK.
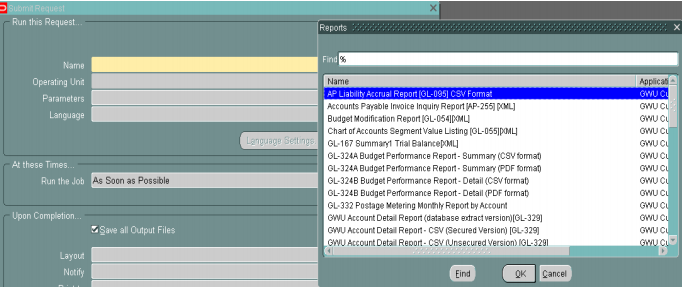
- The Submit Request from appears. Use the list of values key to find the GW Account Detail Report (CSV) GL-329, select the report, and click OK.
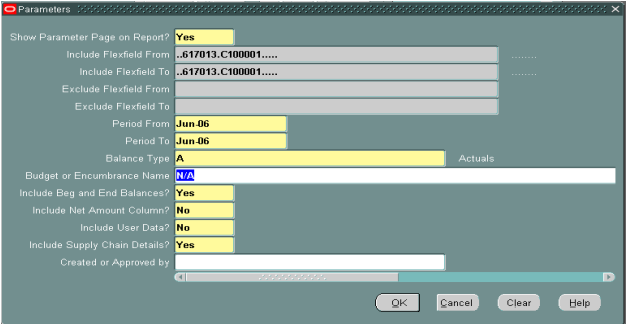
- Complete the parameter page. Click OK once completed.
Note: A flexfield is a field made up of segment values; in this case: entity, account, organization, funding source, net asset class, function, location, activity, future. You can run the report using these values. You can select to run the report for single organization and/or funding source; range of organizations and/or funding sources; a single account, organization and funding combination.
- Include Flexfield From/To: Segment value(s)
- Exclude Flexfield From/To: If applicable, segment value(s) to exclude if a range is selected, otherwise click OK
- Balance Type: Actual, Budget or Encumbrance
- Period From/To: Single period or a range (Example: Jul-06/Dec-06)
- Budget or Encumbrance: Name for the budget or encumbrance type selected
- Include Beg and End Balance? Yes or No
- Include Net Amount Column? Yes or No (column added, nets drs/crs)
- Include User Data? (additional fields are added to report, check EASIER for details)
- Include Supply Chain Details? Yes (default) or No
- Create or Approved By: Optional
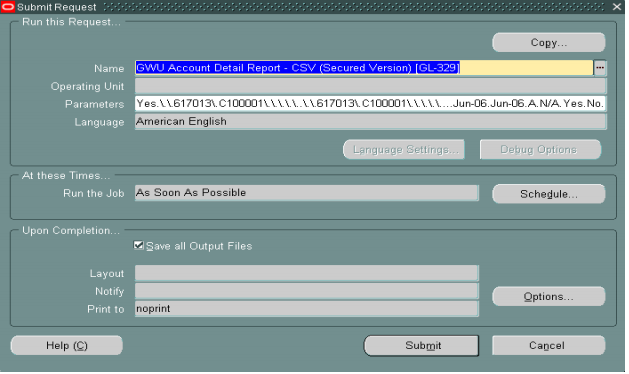
- You are now ready to submit the report for processing. Click Submit.
- Click Refresh Data tab to check the progress of your request.
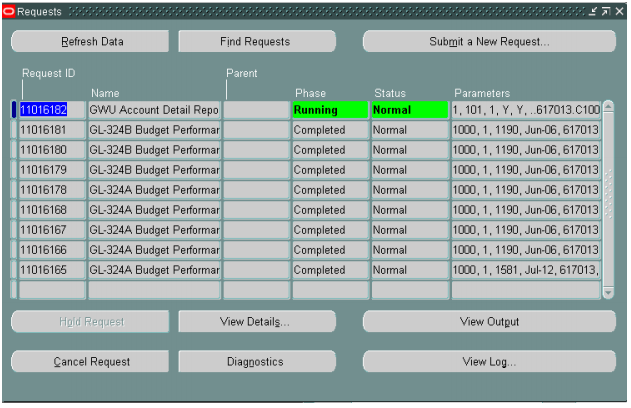
- Once your request has completed:
For CSV format, click the View Output tab.
Right click on Save As.

- Select a Directory to place the report.
- File Name- append to displayed name or choose a different name.
- Save as type -Text File.
- Click Save.

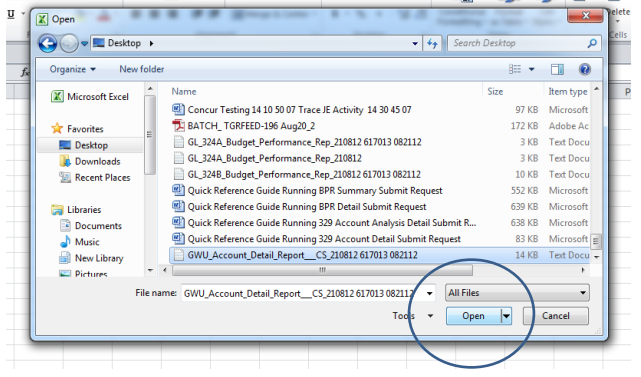
- Open Excel and locate the file saved. Make sure the File Type is set to All Files, click Open.
- Three step import process to Excel.
- Select – Delimited and click Next.

- Select – Check Comma, uncheck Tab
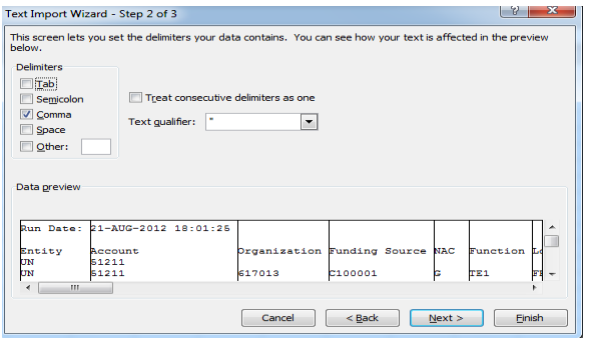
- Click the Finish Tab, the report appears as an Excel worksheet.