
Labor Redistributions User Guide
Background
Labor Redistributions are defined as re-allocations of labor expense to/from a sponsored project. This user guide applies to all sponsored projects with both federal and non-federal awards.
Instructions
Access to the Labor Redistribution module is through Banner Self-Service (GWeb).
- Log into Banner Self-Service (https://it.gwu.edu/gweb) (using Chrome browser)
- Select Faculty, Staff & Students

- Click on ‘Labor Redistribution’ in the pane along the right hand side of the web page.

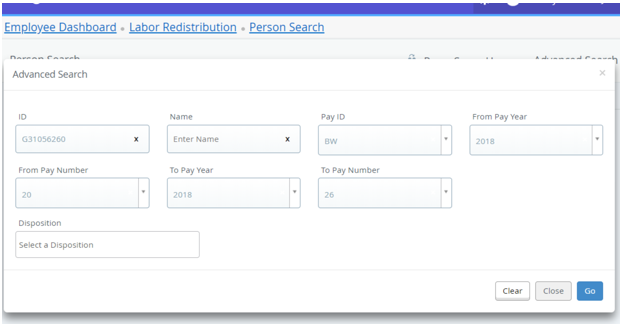
- Upon accessing Labor Redistribution, the Advanced Search/Person Search page will be presented.
- Enter the criteria of the person and pay events that will require redistributions and click Go. See example below:
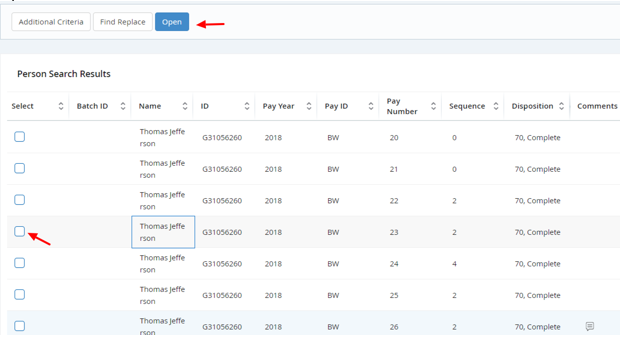
- Double click on the desired pay event or check the check box next to the pay event line(s) and click Open.
Initiator
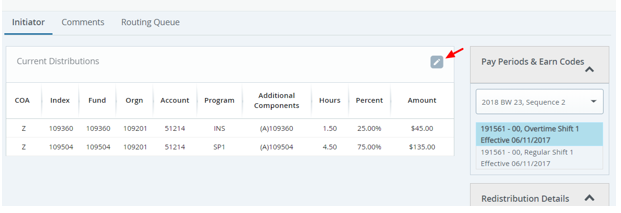
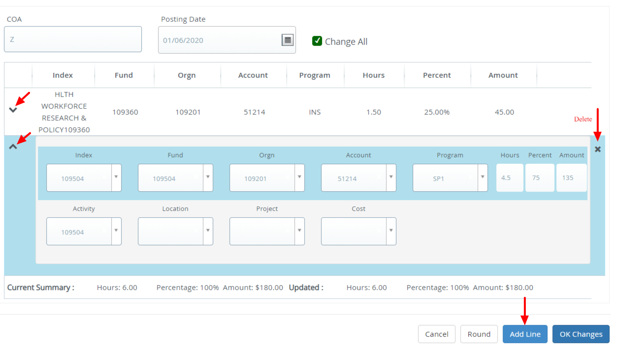
- Click on the Edit/Update icon to begin a labor redistribution.
- The posting date will default to the current date. This is the date that the records will be posted. This date may be overridden.
- Check ‘Change All’ to search for all records identical to the old version of the changed records and make the same changes to all matching records.
- Change All applies only for FOAPAL (e.g., fund, organization, account, program, activity and location) fields or percentages under the same job code (e.g., if a faculty member has a secondary appointment, the distributions will not change using the "Change All" function).
- Change All is applicable to a single-pay event record or selected records.
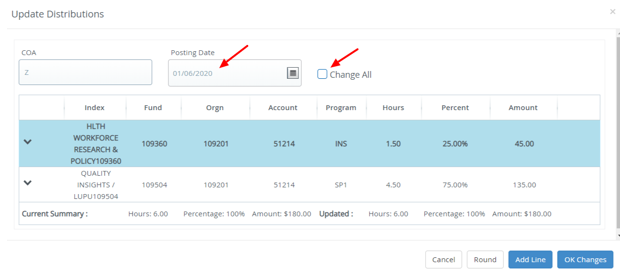
- The down or up arrow expands or condenses the line. Once the line is expanded, the line can be deleted or the FOAPAL can be changed for Amount, Hours and/or Percent.
- If one of the values (amount, hours or percent) is changed, then the other two values will automatically recalculate.
- A new line may be added by clicking the 'Add Line' button.
- When the changes are complete click ‘OK Changes’.
Routing Queue
Check the routing queue after submission to ensure that the LR will be routed to the correct queue member.
- Additional members may be added to the routing queue before you submit.
- If submitted, the next approver may add additional members.
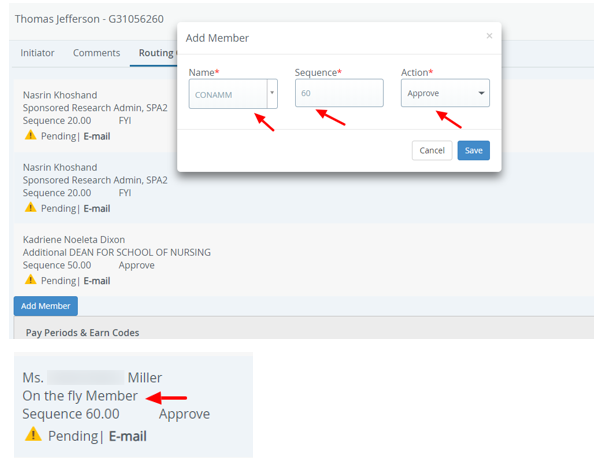
- To add additional members, Access the Pay Event.
- Click on the ‘Routing Queue’ tab.
- Click ‘Add Member’.
- Search for the member by name and select the new queue member.
- Enter the sequence number and the action (identify the member as approve or FYI).
- Click Save.
- The new queue member will show as an “On the fly Member”.
Final Submission
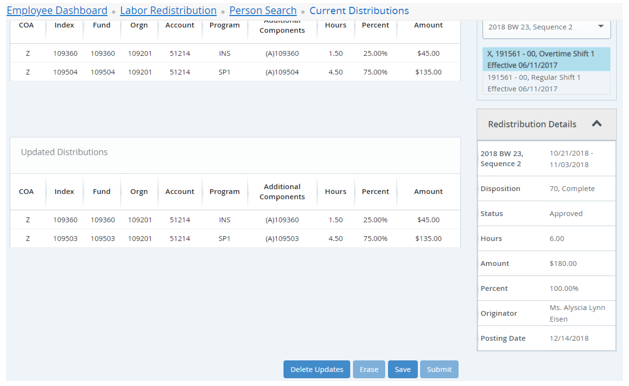
- Click on the ‘Initiator’ tab.
- Once everything has been completed and accurate, click ‘Save’ and click ‘Submit’.
- ‘Delete Updates’ removes the redistribution prior to Save.
- 'Erase' removes the redistribution prior to Submit.
- Once submitted, the redistribution cannot be removed.
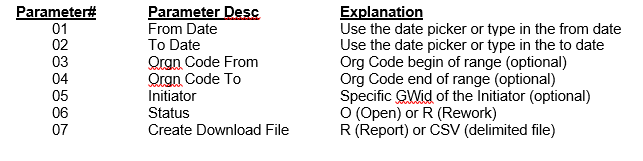
Banner Report - PZRLROP (Open Labor Redistribution Report)
This report shows the open labor redistributions and the status of the approval queue. Access this through Banner Admin Pages by either typing in the report name on the main page in the search or through job submission (GJAPCTL).
- Note: If you do not have access to this report, request “Modify access” to the Banner profile: *GW_H_EPAF_APPROVALS_C (via the Banner Security Access Request).
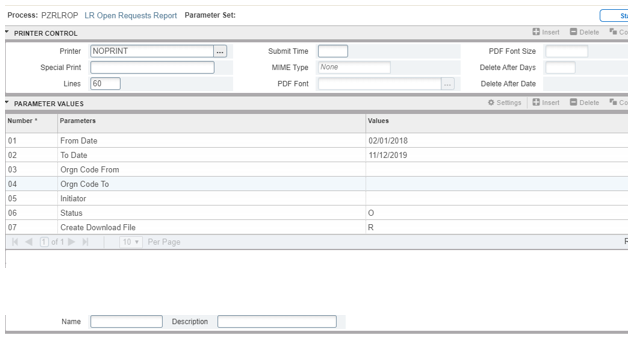
Report Output Example

The following Banner 9 functions are enabled:
- Employee Profile
- Pay Information
- Earnings
- Job Summary
- Employee Summary
Other options available depending on the user role are:
- Effort Certification
- Labor Redistribution Pay Stub Administrator
Note: Navigation between Banner Self-Service 8 and Banner Self-Service 9 pages can be accomplished by clicking on the desired tab.